Showing posts with label zoya. Show all posts

Thursday, August 8, 2013

Zoya Pixie Dust Fall 2013 Swatches

Happy Thursday, Everyone! I'm still feeling pretty lousy and hoping that I'll be on the up and up by tomorrow. For now, I've got some swatches to share with you all! I splurged and bought the entire fall Pixie Dust collection from Zoya a few weeks ago and thought I'd share my experience with them here with you all. It's a picture heavy post to hang in there!

These are my first Pixie Dust polishes and it's safe to say I'm a convert. They are incredibly forgiving polishes to work with, which allows for fast application. They are a matte finish that doesn't require top coat, and they dry in minutes. I actually took my one of these camping with me last weekend and was out and about 5 minutes after applying it. I love that. 

Carter
Carter is a "Royal Purple with matte, textured, sparkling metal finish" and while I don't quite the the metal effect, this is definitely a rich and royal purple. This is 3 coats and was by far the toughest formula to work with - it was a bit on the thick side - but nothing you can manage easily. 

Dhara
Dhara is a "firey orange copper" and I would definitely agree with that description. This orange is fabulous and rich, but I'm frankly a bit confused that it's part of a fall collection. I suppose I could see this worn around Halloween time though? This is 2 coats and had a great formula.

Arabella
Arabella is a very pretty fuschia with the same "metal" finish as the rest of the collection. This reminds me a bit of Zoya's Blaze, but I think this has more pink in it. This is almost a one coater, but I used 2. Again, great formula and easy to work with.

Tomoko
While I'm not quite sure of the name, this champagne color is one of my favorites from the collection. I was not expecting to love it as much as I did and it was just so elegant and romantic. This is 3 coats (since it's a bit more sheer and light) and was a breeze to apply.

Chita
A fabulous forest green, Chita made me feel like I had moss or grass growing on my fingertips! While this may sound creepy, I really loved this color. I don't have a green quite this rich and, well, green. This is ONE coat! Excellent application. 

Sunshine
While blue doesn't come to mind when one hears the word sunshine, that may change after seeing this polish. I am in love. I think this is my favorite of the collection. Zoya calls it "Van Gogh Navy Blue" and I couldn't agree more. I am actually really tempted to use this as a base and recreate Starry Nights. This was another one coater which is excellent for polish wasters like myself and the formula was perfection. 

Overall, I really love this collection. Some of the colors are a bit bright for a fall collection in my opinion, but I can see them being worn for certain holidays. The formulas are almost all perfect and easy to work with and you can't ask for much more when it comes to nail polish. My favorites from this collection were Sunshine, Chita and Tomoko. You can purchase the collection from Zoya here. If you've never bought or made an account with Zoya, by clicking that link and making an account, you should receive a free bottle of Zoya polish which can be found in your "My Coupons/Promos" section. More info on it here

What is your favorite from this collection? Does this feel like a "Fall" collection? 

Happy Polishing!

Monday, July 29, 2013

Sparkly Tribal Goodness

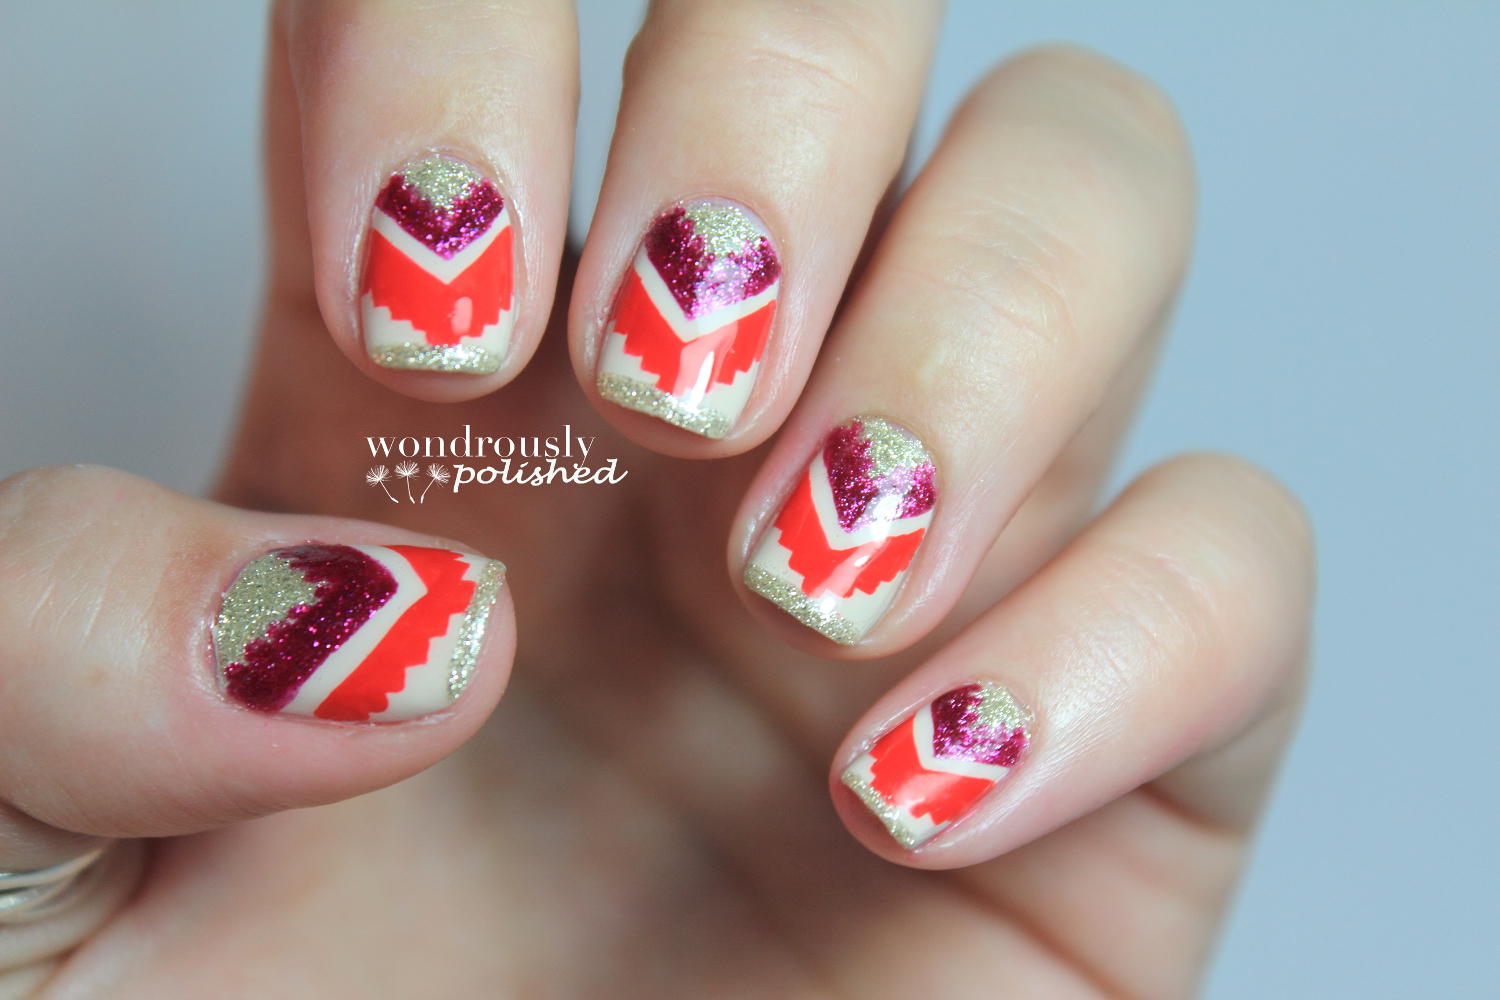
Hello, my dears! Tonight I've got another post inspired by something I came across on The Hunt! I am kind of obsessed with this site. I saw this fabulous tribal print sequin skirt and new immediately that it was meant to be on my nails. 

This was an all Zoya nail polish manicure, with 2 of the polishes coming from their latest Pixie Dust collection - he silver is Tomoko and the purple is Arabella. I never would have thought that these would be great nail art polishes, but they are so incredibly forgiving that it was incredibly easy to create sharp lines with them. Surprising, right?? The red is one of my favorites, Maura, and the base is a creamy yellow called Jacqueline. 
I freehanded this design and it was super easy to pull together with my no. 10/0 brush. This brush is great because it is long enough to do striping work with, but just thick enough that you can do detail work with no issues.
I hope to have some swatches of all my new Zoya babies up soon. I've been wearing Tomoko by itself nonstop for the past few days and am truly in love with it. Hope everyone had a great Monday! 

Happy Polishing :)

Sunday, January 20, 2013

A gradient and a fun pattern!

Good news! I finally ordered a new battery charger for my camera and I'm so excited to hopefully have my baby up and running again. 
While I'm waiting, I've been nail painting! I have been itching to do a "real" gradient for awhile now but for whatever reason never got around to it. The gradients I have done have all used glitter, with no real worry about how well the two colors transition. I took a look at this fabulous tutorial by the amazing Sammy at The Nailasaurus in order to create my gradient and while I there is definitely room for improvement, I really like how everything turned out :)

I really like the color combo of these and especially love how it looks on my fingers. As the day progressed, I started getting a nagging feeling to add something else to these. I recently got a new nail art "pen" from my Nail Art Society January bag and decided that the pen and my nails should become better acquainted. 


This is the nail art pen I used for this look. It's made by Cherimoya and I really liked how it applied. Very convenient!

Happy Polishing! :)

Tuesday, January 15, 2013

Striping Tutorial with Zoya's Kieko

So after my polishing binge last night, I ended up with Kieko on all of my nails and decided to spend a few extra minutes to make something quick on my middle fingers. I got asked by a few people on Instagram how I did this design so I decided to put together a quick little pictorial to share how easy it can be for you to have it as well! 
Since it was getting late I decided to use some of the striping tape I got from Amazon instead of spending the time to hand cut painter's tape like I usually do. This tape is super cheap (thought it can take a little while shipping wise) so I didn't feel too bad using it in this way. You'll need 3 colors for this design and to make things easier, a small paint brush (striping brush works as well). You can always use the polish brush as well, though you'll have to be very meticulous to make it happen (or use thicker stripes).

1. Create an 'X' with your striping tape across the middle of your nail.

2. Carefully create 'V' shapes with additional tape in triangles of the X. If the tape is being finicky I'll use tweezer to grab each strip so my greasy/sweaty/clumsy fingers don't have to. This will also help keep the tape from losing its tackiness before getting it on your nail.

3. Dollop out the colors you'll be painting on. I recently started using the cap of a contact lens container to dollop my polish and I'm liking how it's working so far. I used to just dap the polish onto a piece of paper but I found I had to work REALLY quickly because the polish would dry so fast. This seems to reduce the dry time. That being said, this step is up to you for how you procede. 

4. Choosing one of the colors and your choice of brush, paint in the negative space created by the tape. If you're paying attention, you'll see I totally failed on my design when I first painted this on. No harm done though. I easily painted over this with my silver glitter and problem solved. 

5. Using the other color, paint in the final negative area on the nail being careful to not overlap what you've already painted. If I'm using a glitter based polish I like to paint this last so that when I remove the tape, it's had less time to dry and therefore less change of the polish 'tearing' when you pull the tape up. It helps to make a cleaner line. 

6. Carefully remove the tape. 

7. Wait for the polish to dry slightly before adding a top coat to help reduce streaking. 


This look took me about 15 minutes total so if you've got the time and patience, it's definitely a doable mani and an easy way to add something unexpected. Let me know if there are any questions or if you think you'd ever be up for trying something like this! :)

Happy Polishing. 


My new Zoya loves!

Yesterday, I welcomed 5 new babies into my home! That's right, my Zoya's came. YEEEEEEE!

From left to right: Kieko, Caitlin, Megan, Dove and Jacqueline. 

I was definitely so excited about these that I went ahead and swatched all of them last night! I did get a few requests to do so, so I'm not completely insane ;) 

First up...
Megan! Megan is described by Zoya as taupe grey creme and it definitely has a lot of greys in it. However, I also see a lot of pale lilac in it despite what they say. I really love this shade and it applies great. This is 2 coats with no problems :)
Dove is a really pretty neutral grey that appears to have some light green undertones in the right light. I like this one on much better than in the photograph. This is fairly opaque and 2 coats. 
Jacqueline is a really pretty creme that almost looks like buttah! I was worried I wouldn't like this with my skin tone but I ended up not wanting to take it off! I had to use 3 coats for this one so it could easily present problems with application.
Next up is Caitlin. This is an incredible greyed out light bluish-purple. I really liked this one. I was a little hesitant to buy it at first because I thought maybe it would be too similar to some of my other colors, but I'm so glad I went for it. This was so opaque and smooth that I could have easily gotten away with only 1 coat of this. Lovely!
Last is Kieko. This is an interesting color that I actually really like, but it's a bit too bright for my taste this time of year...yet despite this, I ended up using this for my mani...I guess I do like it! This applied well and is 2 coats. 

Overall, I think my favorites of these would have to be Caitlin and Dove...but then again, I'm completely drawn to muddied greens and blues so I guess I should've known! ;) What are you favs?

Happy Polishing!

Sunday, January 6, 2013

Zoya's Avery with a Pop

Tonight is a quick little mani that I'm actually really liking so far! I love a good nude polish and Zoya's Avery is a great staple color to have. If you haven't already heard, Zoya is having a promo starting tomorrow (1/7/12) where you get 3 polishes for free and all you have to do is pay $10 for shipping. Zoya polishes will run you $8/bottle so this is an awesome deal. Just use the promo code ZOYA2013 at checkout :)

Anyway! My point was that if you're waiting or that big deal to grab some Zoya's now is that time! 

I'm continuing with the nail art challenge for January and I'm going to consider this my Pastel challenge. Maybe that's a stretch, but this is where my inspiration went tonight :) And onto the look! 


As a bonus, here is Zoya's Avery on it's own! It's a great nude polish that you should snag up during this deal! :)

Happy Polishing :)


Wednesday, December 5, 2012

Freehand Triangle Cutouts with Zoya's Aurora!

As I mentioned in my last post, I've been incredibly sick and had a bunch of down time in the last few days. I spent yesterday watching I Heart Huckabees, A Good Old Fashioned Orgy, and The Dark Knight Rises and before/during/after I felt like I was going crazy from being stuck inside. Regardless of my aches and pains I pulled out my polishes and made an attempt at a new design.

I was originally going to do another entry (plaid themed this time) into the December Nail Art Challenge, and was somewhat inspired by one of my favorite new plaid flannel shirts from Urban, but when I painted everything on I was not impressed.

I restarted and grabbed Zoya's Aurora which is another stunning holo color from their Ornate Collection.  I'm also realizing I'm obsessed with Ulta's Concrete Evidence, which I've used before. I did this design free hand with my striping brushes and I really like how it came out. 


This design isn't too hard to recreate - just a bunch of lines and X's. There were a few nails where my X's made the Aurora triangles too small but that was easily remedied with more Aurora and a redux of the X stripe! Also needed for this mani: lots, and lots of patience! 

Happy Polishing :) 

Sunday, November 18, 2012

Let sleeping nails lie? Pfft!

I am incapable of just letting things be. I like to tinker. I will change my phone background every few days because I'm bored with the current one. My blog background, style and layout will no doubt change several times in the coming months. The same happened with my nails tonight. It's a wonder I've been with the same guy for 7 years ;) 

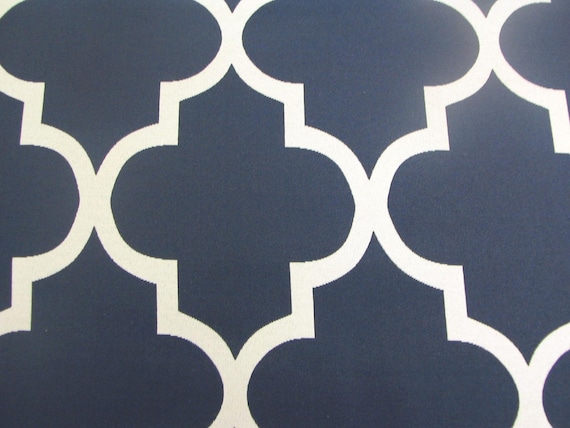
Tonight, I was especially jonesing to paint my nails but I was still completely in love with my mani from last night. So I started browsing patterns online that I could possibly make work with what I already had going on. About 3 pages in and I came upon this one: 
Source: http://www.etsy.com/search_results.php?search_type=all&includes%5B0%5D=tags&search_query=navy+blue+pillows&page=1
I could have gone with a free hand attempt at this, but I wasn't really in the mood for the potential screwup that could occur and the fallout afterwards. So I went with taping instead. Still a pretty terrible idea! 

I ALMOST gave up on this pattern and had to get pretty innovative in order to make it happen, but here is the result. 

I even managed to get both thumbs!


Happy Polishing.