Showing posts with label gradient. Show all posts

Monday, August 19, 2013

Gradient Nail Tutorial for Lulu*s!

Happy Monday, all! Just a quick post for right now - wanted to share my latest collaboration with the Lulu*s Blog! It's a super simple but fun gradient mani to go with their back-to-school week! Be sure to check out the blog post for the how-to on these :) 
Happy Polishing! :)

Tuesday, August 13, 2013

31 Day Nail Art Challenge - Day 10: Gradient Nails

If you've been in the nail art world long enough, you might notice there are some discrepancies between the terms "gradient" and "ombre." Personally, when I first got into nail art, I learned that a gradient is when the color transition happens on each individual nail and an ombre is when the color transitions over a series of nails from a lighter shade of a single color to a darker shade off that same color (one color per nail). There are some who swear ombre is what I think of as a gradient and vice versa. There are others who think the terms are interchangeable. If the nail art world can have an up in arms debate about something, it would be the difference between the two terms.

As an homage to this classic nail art argument, I decided to do a gradient look that also ombres - meaning, each nail has two colors that transition AND each nail color will go from light to dark - that way I can appease everyone's opinions! What can I say, I'm a people pleaser ;) 

I'm still trying to decide if I like the color combo I did for this look. It's a very hard transition and the purple I had hoped to achieve between the red and blue didn't appear as I had hoped it would. Regardless, I do think I like these. 
I used 10 colors for this look, mostly Zoyas (apparently I'm in a Zoya mood lately). From the thumb and starting with the red for each nail: 
Zoya Pepper
Zoya Natty
Zoya Livingston
Zoya Breezi
Zoya Maura
Zoya Robyn
Wet n Wild Heatwave
Zoya Yummy
China Glaze Surreal Appeal
Zoya Kristen
If you're looking for a gradient tutorial, there are several fabulous ones if you simply type in "gradient tutorial" or you can check out a Lulu*s tutorial I did a few weeks back that shows the steps I take for a gradient look. You can find that here

I also took a picture of the ombre that occurred before the gradient occurred using my red polishes. I really liked this ombre look on it's own :)
Where do you stand in the gradient/ombre debate? Also, final side note, I think I'm going to switch back to my dark background - thoughts between that and the white background?

Happy Polishing :)

Wednesday, July 31, 2013

31 Day Nail Art Challenge - Day 6: Violet Nails

Oh boy, it is late! I'm a few hours past the Tuesday "deadline" for today's challenge, but I think it's worth the wait! I must say, I'm pretty proud of Meghan and I for keeping up with this so far...even if we've been a few hours late with some posts. 3 weeks into this adventure, and I am really enjoying this experience. Meghan is so talented so I doubt anyone can complain about having to look at her work :)

After trying out a completely different design and scratching it around 11 PM (3 hours ago!), a friend of my suggested a violet gradient with lace on top and I knew immediately I was going to do it. I feel like I say that a lot, but there is something that happens when you love a design - it just FEELS right. ;)
 I love how delicate and soft this look is and I am really pleased with how it turned out. I used Zoya's Julie (light purple) and Malia (dark purple) to create the gradient underneath the lace and though it's not a super prominent gradient, I like it. It's a little tough to see in the photos, but Julie has a very subtle and very pretty shimmer as it has some fine glitter mixed in with it. Very unique! With the help of my no. 10/0 brush from this kit, I painted the lace on with a generic white acrylic paint. 
 I wish I had some fancy tricks for painting patterns like this, but ultimately, it requires patience. If you try something intricate and delicate like this, don't sweat the small stuff! By that I mean, if you have a line out of place here or there, it's no biggie. You will drive yourself insane if you try and make everything completely symmetrical and the same! I also always recommend using a top coat over your base polish (especially in this situation since your base is also nail art) so that you can easily remove any mistakes you've made with the acrylic nail art on top of it.  
What do you think of this look? 

Happy Polishing! :)


Monday, July 15, 2013

Lulu*s Beach Bonfire Tutorial

Happy Monday! How did everyone's day go? I started my first day at my new job today and so far everyone has been really nice and supportive. Aside from accidentally locking my keys in my car right after I got out of my car at 8 am, it was a pretty good day ;) But boy oh boy! It has been such an emotional roller coaster for me the past few weeks. I feel so emotionally drained and I'm so exhausted! 


Today I have my latest tutorial for the Lulu*s Blog! The theme for this week was Beach Bonfire and to me, bonfires mean sunsets on the beach! I did a simple gradient and added some silhouettes of palm trees to pull this look together. Once again, be sure to check out the Lulu*s blog for my quick how to of a gradient nail :) 

Happy Polishing! :)

Tuesday, April 2, 2013

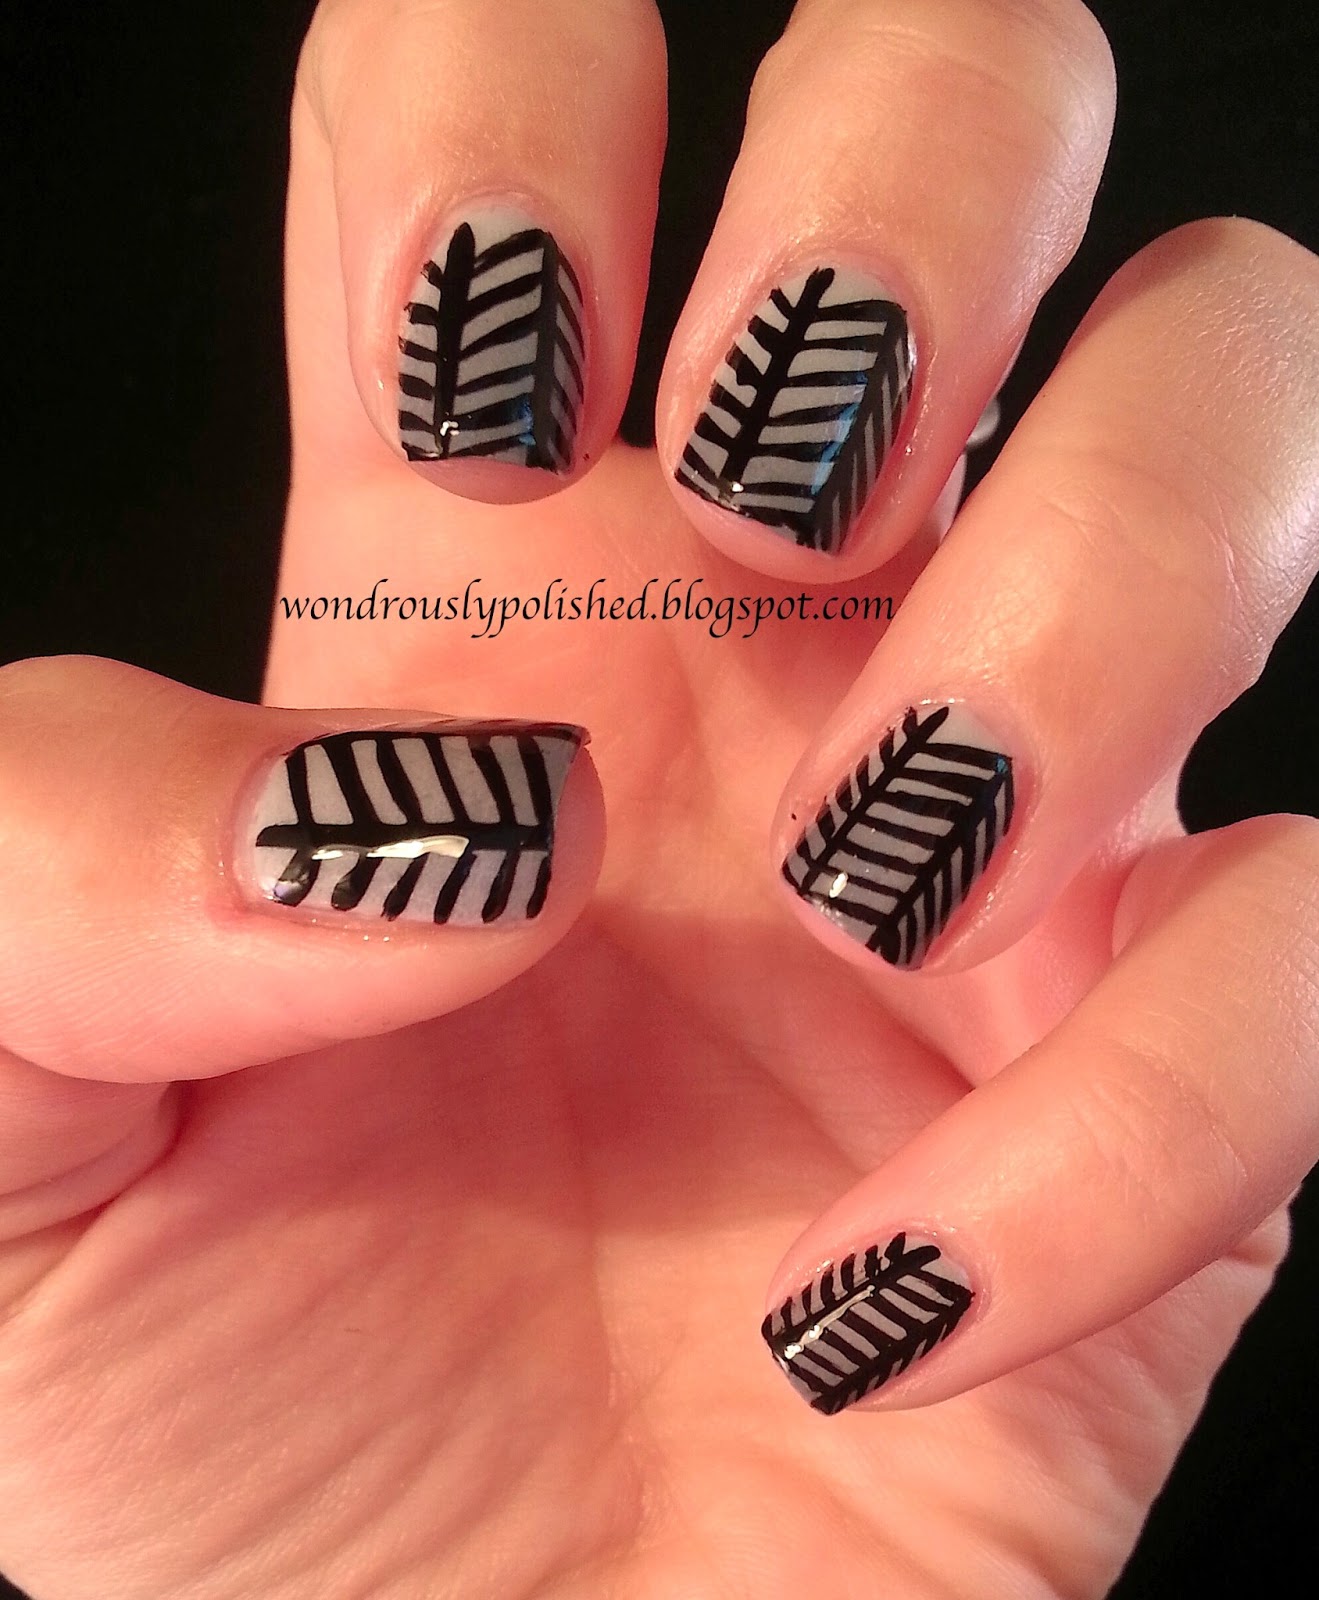
Gradient and some free hand stripes!

On Sunday I had a friend tell me that they would love to see pink and blue together in nail art so I decided to create a gradient using the two colors! Well, if you'll remember your kindergarden lessons of how colors work, when you blend red (or in my case pink) and blue together, you get purple! Oh Lindsey, sometimes your brain doesn't work, does it? 

Despite my gradient turning more into a pink to purple gradient, I like how these turned out. As a friend put it, they are FIERCE! ;) I added a matte top coat for good measure as well. 
I also got the inkling to create a quick tutorial (I also put together one for how I do my gradients but I am undecided on whether or not I'll post it since I feel like so many people have great gradient tutorials already. Besides, I'm crap at explaining things!). You'll need a striping brush or nail art pen (which, lets face it, is still a brush...I don't know why they call them pens -_-) and base color completely dry. I suppose these could potentially look cool if you chose to do nude nails underneath the black ;) 
 1. Create a 'V' at the end of your finger, making sure that the point of the 'V' is at the very middle of your finger. 
2. Create a smaller 'V' just inside the larger 'V'.
3. Paint a straight line down the middle of your finger and stopping once you reach the middle of your nail (the point of the 'V').
4. Add additional stripes equidistant and parallel to the first straight lines you made. 
5. Finally, add your favorite top coat (or matte top coat) to complete the look! 
 Be sure to check out the Born Pretty Store and use my coupon code for 10% off your order in addition to free shipping world wide! :)
Happy Polishing! :)

Wednesday, March 13, 2013

March Nail Art Challenge - Day 4 & 5! (I'm cheating...)

Alright, alright. Yes, I am cheating a bit with this one. I was supposed to do Color Blocking for the 4th day of the March Nail Art Challenge but I fell behind :/ Well, I've decided to combine the 4th theme with today's new theme of Luck! As it is March and everyone's mind is on St. Paddy's Day coming up in less than a week, I decided do a color blocking with a four leaf clover! Luck and color blocking. There, I've met both themes in one mani ;) 

I've also added a touch of gold for some good luck as well :)

These are pretty simple to create. I used Julep's Courtney, Hoch, and Fiona, along with China Glaze's Running in Circles to create the initial squares. Then, using my dotting tool, I create small hearts in each corner of the boxes. The rest of my fingers are Courtney and Essie's Good as Gold in a simple gradient. 

Happy Polishing :)

Sunday, March 10, 2013

March Nail Art Challenge - Day 3: Gradient

Okay, so I suck at keeping to a schedule. But I think I have a worthy excuse! I have been so busy studying for a big engineering test every weekend all day long on top of working all week. No days off makes for little time for nail art. 

I finally got around do doing the 3rd installment of the March Nail Art Challenge (though, I was supposed to start the 4th one today...oops!). The theme was gradient and I wanted to use two more of my new Julep Polishes to create the look. I ended up pairing Georgia, a pretty peach micro shimmer, with Susie, a muted mint green creme. These were colors I wasn't 100% sure would look nice together in a gradient, but I'm really happy with them! A happy surprise :)
 If you don't know by now, I don't know how to leave simple nails like this alone. I can't resist the urge to add some extra pizzazz to my nails when I can. So, I got out my trusty striping brush and added some random and odd triangle and polygon-ish shapes over these. I really love how these turned out. Pretty subtle, but I love them :)
Be sure to check out some other fabulous bloggers through this weeks GFC Collective! 

Happy Polishing :)


Sunday, January 20, 2013

A gradient and a fun pattern!

Good news! I finally ordered a new battery charger for my camera and I'm so excited to hopefully have my baby up and running again. 
While I'm waiting, I've been nail painting! I have been itching to do a "real" gradient for awhile now but for whatever reason never got around to it. The gradients I have done have all used glitter, with no real worry about how well the two colors transition. I took a look at this fabulous tutorial by the amazing Sammy at The Nailasaurus in order to create my gradient and while I there is definitely room for improvement, I really like how everything turned out :)

I really like the color combo of these and especially love how it looks on my fingers. As the day progressed, I started getting a nagging feeling to add something else to these. I recently got a new nail art "pen" from my Nail Art Society January bag and decided that the pen and my nails should become better acquainted. 


This is the nail art pen I used for this look. It's made by Cherimoya and I really liked how it applied. Very convenient!

Happy Polishing! :)

Friday, January 4, 2013

Sparkle Gradient with BL, CG and SOPI

Today's nail art challenge is Sparkles! I'm really loving this look and it's super simple to create. The base color is Butter LONDON's Royal Navy and the gradient is made with China Glaze's I Herd that and the chunky glitter is Sephora by OPI's Only Gold for Me top coat.


I'm off to dinner. Happy Polishing :)